


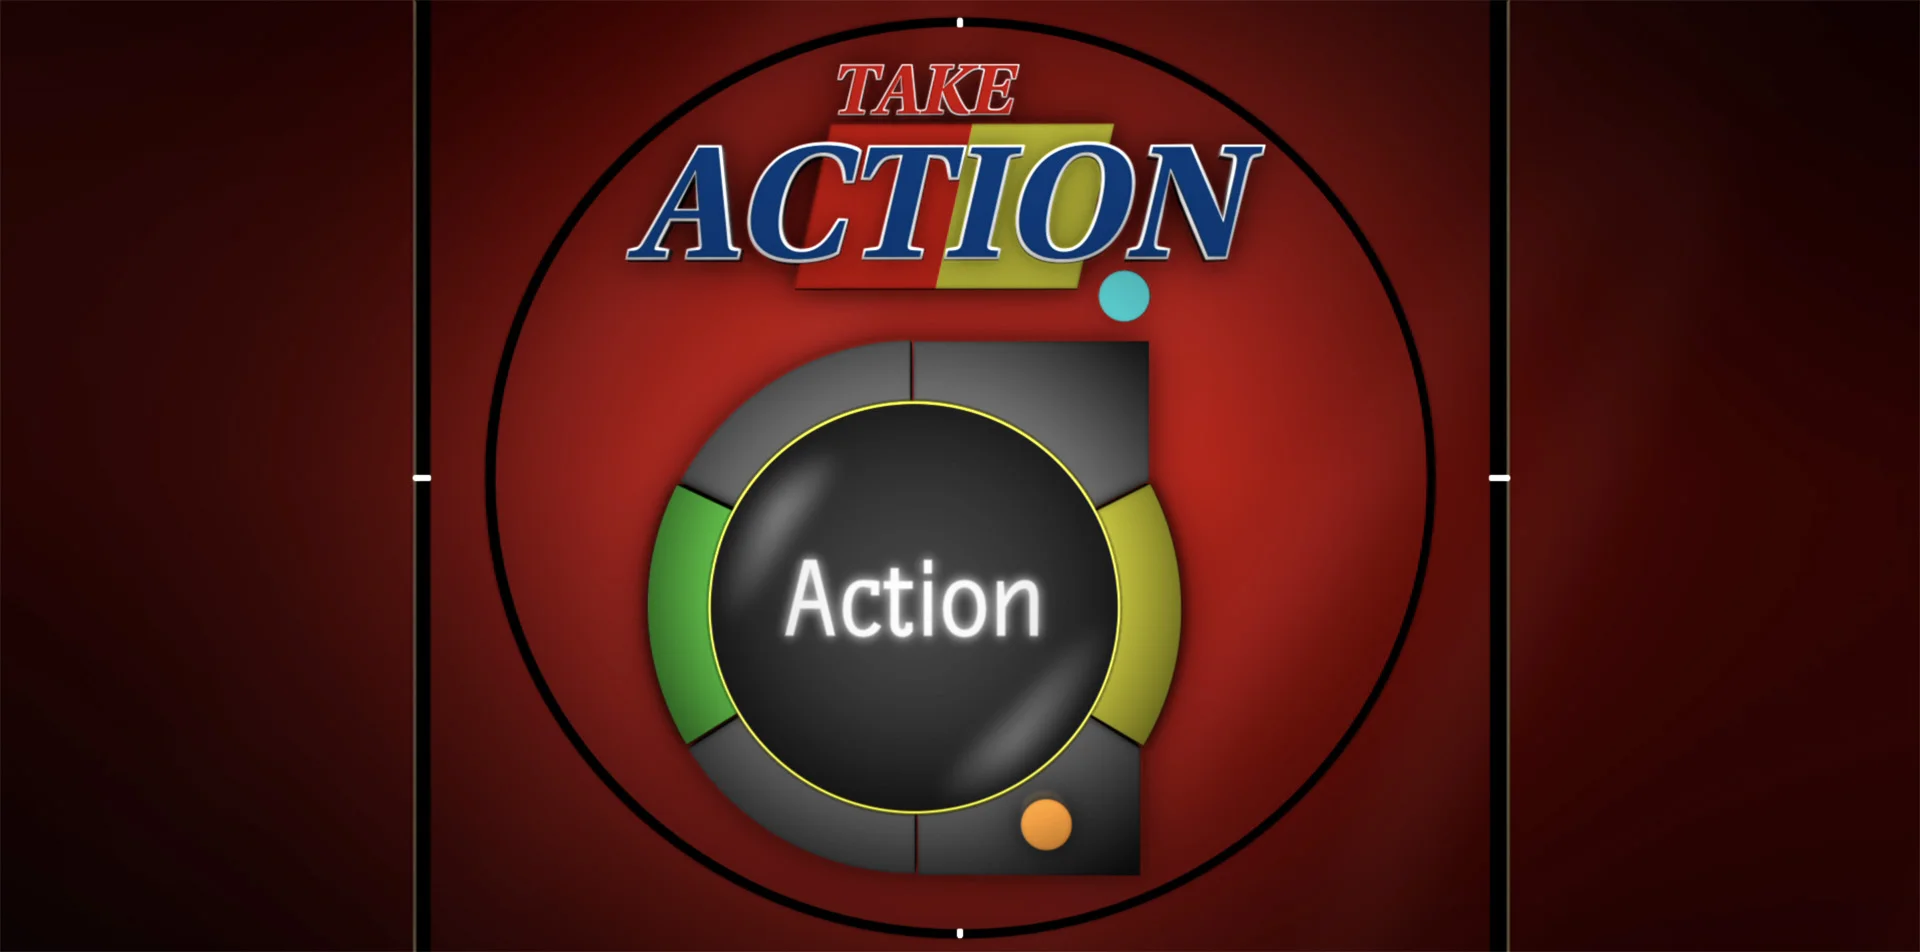

1st place - K3nt
1st place - K3nt
2018 - 1st Place
"K3nt"
by charles marchand - montreal, canada
From Charles:
Done on 2019 Flame running on iMac with 64G RAM and 8G on the Radeon Pro card.
You can model, texture, shade and animate in action using Flames custom tools but just how far can one go?
Although limited, outdated and buggy, the tools are there and the initial performance is impressive. The general workflow for building and animating models is efficient and the PBR shading environment looks great.
The performance quickly drops as you build up the scene.
I think I've reached the limits with this short animation. My hardware resources were limited and ran into constant memory related crashes in the end.
I had problems with specular noise. A simple tool to somehow filter/attenuate this out would be useful.
The absence of shadow casting with MAC is a huge drawback.
The challenge was a lot of fun!
2nd place - The Incredible 5
2nd place - The Incredible 5
2018 - 2nd Place
"The Incredible 5"
by vipul bhalala - mumbai, india
From Vipul:
I had this story in my mind , the challenge was to fit it in the stipulated one minute. As I visualised it in a simplistic super-hero comic-book style, I used G-mask to create the characters and used the new Gmask link feature which was user-friendly to draw, create multiple shapes and animate. In matchbox , node-based effects like colour correction , glow and other effects was very easy to use without slowing down the setup. The improved Batch, Action and Matchbox features have made using multiple nodes easer and extended the capability for execution.
To create depth in shots of 2D character and 3D characters were composited in Z-Depth 3d environment. Thanks to the new Autodesk plugins, we have more options to realise our creatives.
Thanks for your support.
Regards,
Vipul Bhalala
3rd place - OFOW5
3rd place - OFOW5
2018 - 3rd Place
"OFOW5"
by jesper nybroe - dusseldorf, germany
From Jesper:
Originally I was gonna do a ‘remake’ of an old title sequence I did many years ago, but the limited 3d modelling tools shot that idea down.
Then what….. A typewriter, of course!
And to make it really fun, I wanted to do everything as a single camera move, which is always a great challenge.
So I designed a typewriter and started thinking about where it should be… Inside a hypertech-odball-sphere-that slowly ‘melts’ away to reveal the inner construction.
The hologram text thingy ended up being a mixture of Atomize, Particles, Distort, Emboss_Lens, Glow and various textures.
I wanted a little more to happen than just to stay in the first sphere, so I somehow needed to get from, typing ‘One Frame Of White’ to somewhere I could reveal the ‘5’ as the grand finale… So I decided to exit the sphere via a tunnel…. And that all of sudden ended up with me creating the Big Bang and earth on my way to the final sphere, where I could reveal the number, 5!
And of course I had to have the good old Flame logo somewhere, so that got mounted inside the sphere.
Cheers,
Jesper
4th place - Wolf: Five Realms
4th place - Wolf: Five Realms
2018 - 4th Place
"Wolf: Five Realms"
by andy dill - burbank, usa
From Andy:
Wolf: Five Realms:
The first realm: The traveller rests alone at the edge of a cliff, A sword pierces the sky and splits the realm in two. The traveller’s nemesis appears. She flees to the other realms: first desert, then snow. But she’s moving closer to him, not away.Finally they face one another. Her spirit ignites and the shockwave obliterates her nemesis and tears open the realm to reveal a new world.
My aim was a story. Something I'd have trouble articulating later beyond blanket phrases. Painterly if you will. Originally the story was about collecting five owls in the snow. There was going to be a wolf (hence the title), but that changed after I had a vision of a showdown. The snow stayed, but the "five" theme dictated four other locations. Most of them made the cut. On the last day, my wife told me to drastically re-edit it and lose all subtitles. She was right, and I got out the chainsaw. One location and two of my favorite shots got cut. Now it's got a new story, one I've got even less of a grasp on. I like that. Changing direction on a whim, being inspired by small things, thinking of new tricks to implement, this has been exceptionally rewarding. I look forward to making more. Also sleeping. Haha.
5th place - Only 5 Grams
5th place - Only 5 Grams
2018 - 5th Place
"Only 5 Grams"
by christian roos - oesterich-winkel, germany
From Christian:
The idea for this story came when I saw an animal movie about Chameleons on TV. I thought I could bring to life a funny Chameleon for the contest. With Paint I started to draw a shape and texture for the Chameleon skin. This really took the longest time since I did paint each of the little wrinkles. Bit by bit, I supplemented the scene with tropical leaves and plants. The waterfall (implemented particles) I have set on a rock, this fits perfectly into the background. All in all, I can say that a lot of the great tools was used such as particles, Lightbox, Substance Materials, 3D shapes, projections, paint, Matchbox Blur, Gradient, Normal and displacement mapping, many GMasks, Lensflare, Replica, Extended Bicubics etc and the great animation tools that helped me to bring the plants to life with just a few clicks. This all helped a lot to realize my idea much more easier. First of all i used the depth of field function to get the desired look of realism but my old mac is a little bit too slow for that great tool with this amount of data. But i could fake the desired look with blur individually placed.
6th place - Musashi's Five Rings
6th place - Musashi's Five Rings
2017 - 6th Place
"Musashi's Five Rings"
by andy davis - los angeles, usa
From Andy:
Background:
The Five Rings were five scrolls that Musashi Miyamoto, the 17th century swordmaster, wrote towards the end of his life to pass at the behest of his benefactor. At this time, the glory of battle was over for Musashi, he focused on sharing his knowledge with his students.
He argues that as warriors, we practice our craft not for the sake of the next match, but instead because in doing so, we connect to the void/emptiness, a buddhist state of mind connecting to cosmic consciousness.
Musashi trained daily up until his death. The sharpening of his craft was his clarity of mind. He emphatically states that reading the words is not enough to understand. We understand by doing. This must be done with our own hands.
The book dovetailed with having recent creative clarity on VFX craft and workflows. I’ve been drawn to proceduralism and apps like Houdini for approaching the problem solving of big data sets. Shot tracking software can be viewed similarly, because it is the strategic gameboard of the VFX battlefield. When we view from this vantage point, we need to solve the problems with the greatest clarity and avoiding distraction of granular details.
Notes:
My setups are very modular, with sections designed to swap out easily.
The result is more of a proof of concept than a final sequence. Cameras, characters, animation, textures are intended to be updateable assets that can be added near the “floor” geo by copy/paste from a lighter action setup nearby.
Timing is played as an updateable asset as well with expression linking.
Was not able to apply and test across the board before deadline.
Expect nodes to be sprayed seemingly randomly into the destination schematic when copy/paste. If you group nodes in action before copy, you’ll have less nodes to collect on destination side. Once cleaned up, attach to the root axis where the previous asset was and delete. Obviously, make sure that the new asset is flagged renderable in the appropriate passes that matched the older asset. It would be great for Autodesk to implement updateable, versionable, digital assets similar to the way Houdini of game engines works with them. This would be a far better solution.
The idea was to structurally design the project so it could be updated with new assets, animation, etc. right up until the deadline. Work on a discrete element separately for greater interactivity that could be plugged into the great beast of the master setup. Try not to do too much actual work in the hero setup, as this increases likelihood of app crash.
This setup currently takes me 2.5 hours on my punch-drunk macPro trashcan to open before it regains interactivity. Not sure what’s going on, tho “bsdtar” is an active process in my ActivityMonitor. Next week I’ll clean up the setups so they are easier to follow and encourage peeps to update w animation, geo and textures. I can also include asset sub sections to make easier for people to play with. Each section takes 2-6 hours apiece to render on the mac. The Fire section with the armored warriors was perhaps the point when the hardware started coughing blood and was not able to deliver by deadline. In general the Fire and Buddha sections contain the most geo and should be manipulated cautiously. Perhaps this will be less of an issue on a Linux box.
There is a point where Space-A and Space-F stop working. Use the compass priority editor to frame the spaces when this happens. A cleaned up version of setup will keep the distance of the nodes closer, impractical when actually working swapping sub setups and dealing with action nodes when uncollapsed have many dozens of outputs. It’d be interesting to see what kind of monster came from “clean up schematic” with this setup.
Includes an animation rig that allows ability to take character dependent geo as I built and updated them. The rig is linked with lookAt expressions (appartently lookAt links in schematic will crash on copy/paste), and there are CTL axis for the rotation of body parts. Think this is more FK than IK, but worked in a pinch. I plan to link the controls to a Variable matchbox shader, then linked to my tangent panels because analog input is great for animation and cameras.
The characters created included armored samurai, martial arts students, a skeletal Death, an artist who picks up the book, a giant hand with a paint brush and a buddha figure. These were duplicated with both replica nodes and old-school expression linked axises where replica broke down.
Animation was only able to be introduced in a few instances because of time constraints and the need to integrate into the master setup. What animation made it in time seems too subtle with all that’s going on. Look for it on the opening character, some of the students and the Death character, as well as the writing hand with sumi brush.
I knew I had to come up with a look that was stripped down and decided upon a woodblock print type of look. To get this I had all outputs active on my action nodes by default. Creating muxes w multichannel groups with hidden links enabled me to connect them once and then Duplicate w Connections (Ctl+Shift+D) and never worry about them again. Since they were always all on, I never needed to go back and turn on/off. I could choose whatever pass needed for the “look” section, which could be treated in a sandbox-style area.
Aside from the god-awful load time of the setup, it renders pretty reliably and reasonably quickly, considering the heavy limitation of the ancient D700 gfx cards in the mac pro.
There are a bunch of elements that did NOT get implemented by deadline:
-linked cameras so that the z-depth pass could make for an interesting dissolve between scenes.
-armored troops with 6 different characters in the Fire section. Opposing armies w expression driven procedural restlessness. Was tantalizingly close to getting the army in the fire section working w armor. A crash caused 13 hrs. To recover from.
-trees and foliage. Concepts considered but time ran out.
-additional couple of pieces of architecture. Japanese aesthetic makes these reasonably easy to build, but time was taken by implementing anim rig.
-animation for all characters. Using anim rig it should be very interactive to create before plugging into the monsterous assemble. Tangent panel controls with constraints clamped should make this fun, interactive process.
-distinct kimono robes for students, samurai and Musashi.
-refinement of look. I wasn’t able to spend the time to ponder and polish. I encourage users to play with these.
-the weird eyes element in the water section are intended to focus at camera at a certain frame, then go back to watching an animated duel. It’d also help to have an occluder element of brows to make the eyes less “detached”.
-Scott Balkcom particles. Snow would be pretty easy to throw into the wind/void section. Sword hits and blood splatters would be a great element, but prolly take some time to implement satisfactorily.
Misc notes:
-animation window can get super heavy. It’s helpful to use the filtering options to hide channels you aren’t working on.
-someone at Apple needs to push eGPU options including nVidia. Also, give us some new fucking hardware.
7th place - Cartoon Cars Race
7th place - Cartoon Cars Race
2018 - 7th Place
"Cartoon Cars Race"
by artur Hałaczkiewicz - Warsaw, Poland
From Artur:
Description of project:
In animation, I tried to keep the atmosphere of Looney Tunes using the possibilities offered by Flame. The Cartoon Cars Race was created on the elderly Flame 2012 at the HP Z800 station, because of it, work was not as easy as pie. Each small change resulted in a few seconds pause of the interface, and during the rendering of the preview without motion blur and anti-aliasing it took almost two hours... At last, in the project, there are more than 100 layers and dozens of modified 3D primitives. But I have got through it! I had to limit myself because of the assumptions of the animation, it was supposed to be longer and more complicated. But as always - there is no time!
In this demo, I put emphasis on how easy is to create complicated movements and control theme in Flame. The Flame was the first in the world to have a system of nodes (yes, I am so old that I remember those beginnings!), which later was copied by all self-respecting compositing programs.
In my animation, some AXIS's are responsible for steering the wheels, others for the car's path, others for tilting to the sides, and others for tilting to the front and back. The whole project is created as one BATCH, and practically as one ACTION (yes, yes, I remember the times when Flame did not have BATCH yet). Shots were made of several independent cameras in one BATCH. As elements I used only a few basic 3D objects with deformer, all graphics are prepared by masks and color corrections - as it is One Frame of White! I did not use any SAPHIRE plugins or matchboxes etc. I did not even use Paint :)
If elderly Flame and old hardware let control the animation using only One Frame of White like that - then imagine what can be done on the video material, imported 3D models with using powerful plugins and scripts!
The film is prepared to watch it in a loop for the best results. Ultimately it's never-ending Cartoon Car Rece!
Best regards,
Artur Hałaczkiewicz
8th place - 5th Season
8th place - 5th Season
2018 - 8th Place
"5th Season"
by kadir arslan - istanbul, turkey
From Kadir:
I have tried to explain in low-poly animations how the new climate (5th season) might be in my vision with the developing technology.
We have an artificial intelligence robot that accompanies me in this adventure. Like everything that is not natural, this artificial intelligence has a number of flaws. It exists in the artificiality to resist the existing nature and to create its own nature. Actually, I am aware that I am paradoxically as a flame artist who complains to the developing technology, but every short film has to say something and this one says everything that are from nature are the best for earth.
I used default FBX, 3d models, fonts, substance noise, light, cast shadow in the film construction. I also used timeline effects
Instead of seeing the disappearance of nature as realistic, I wanted to tell it in a humorous way in a low poly world ...
Cheers!
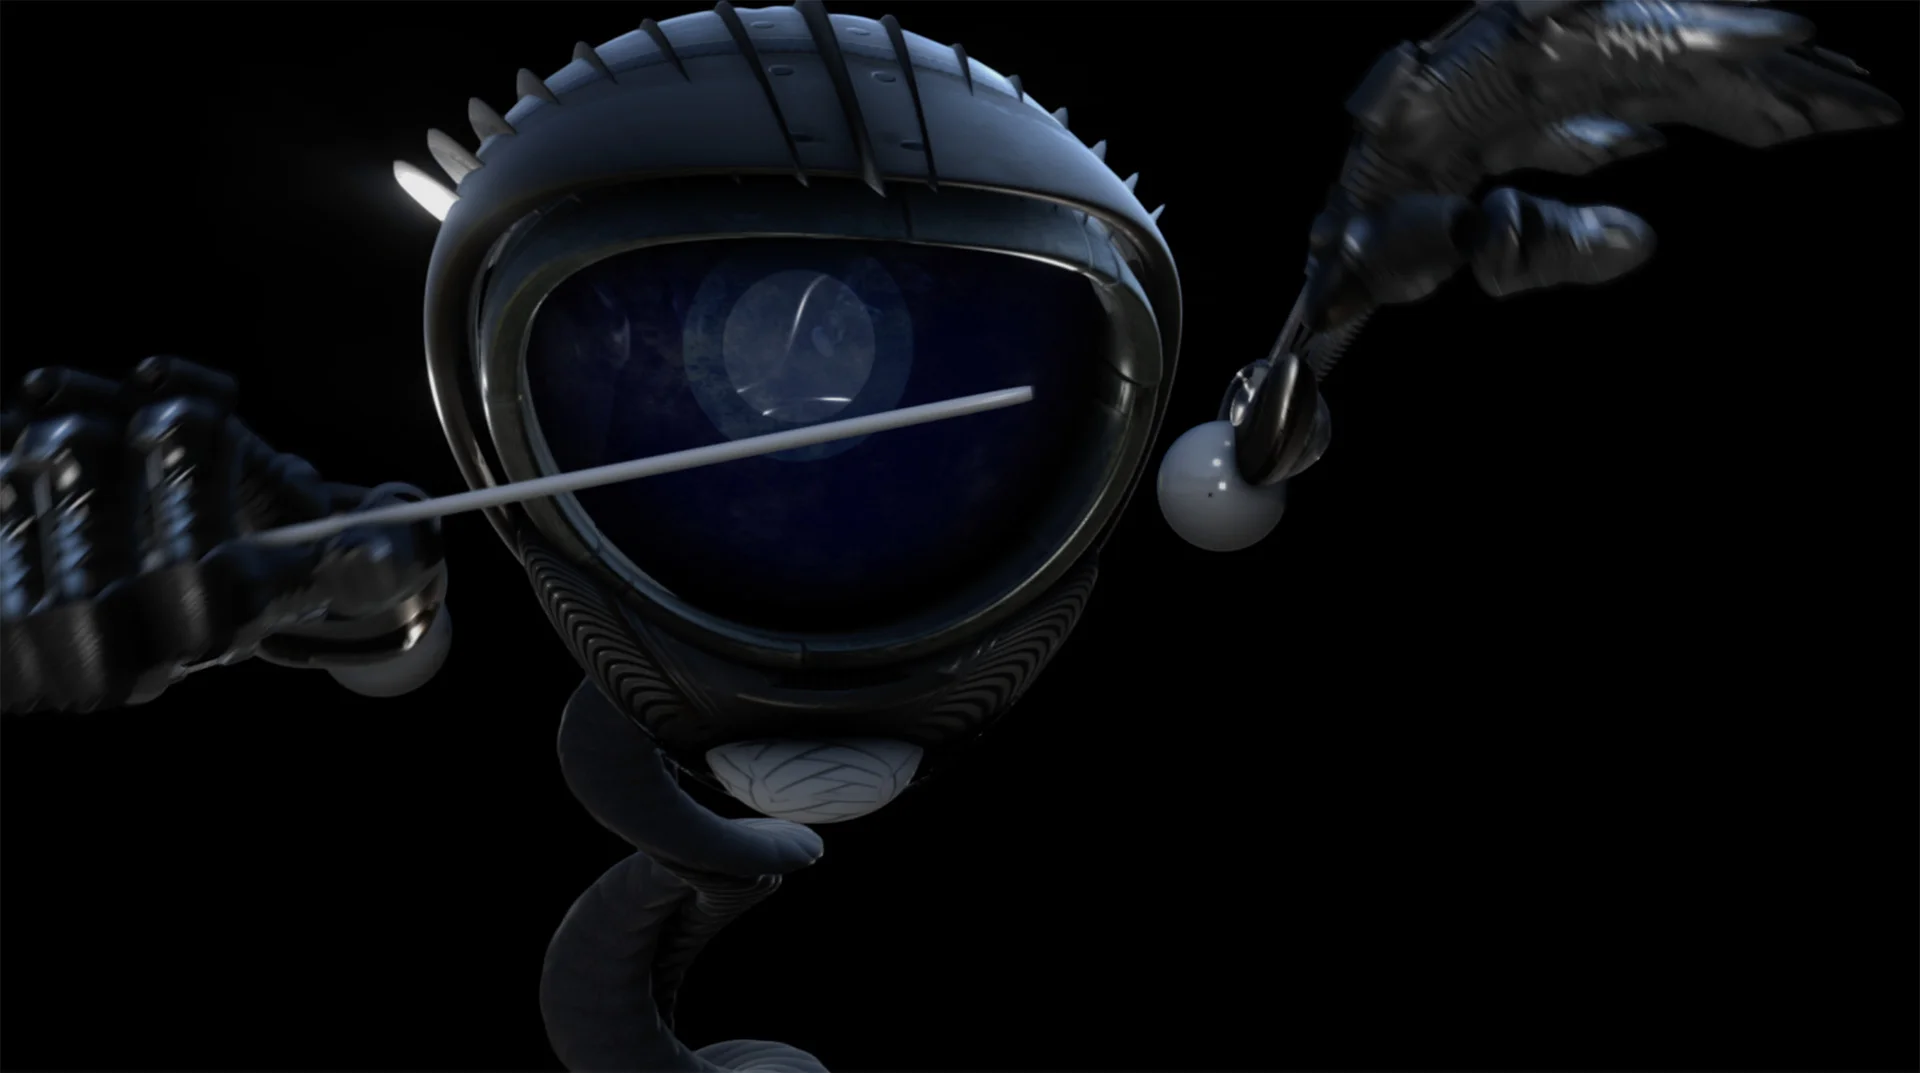
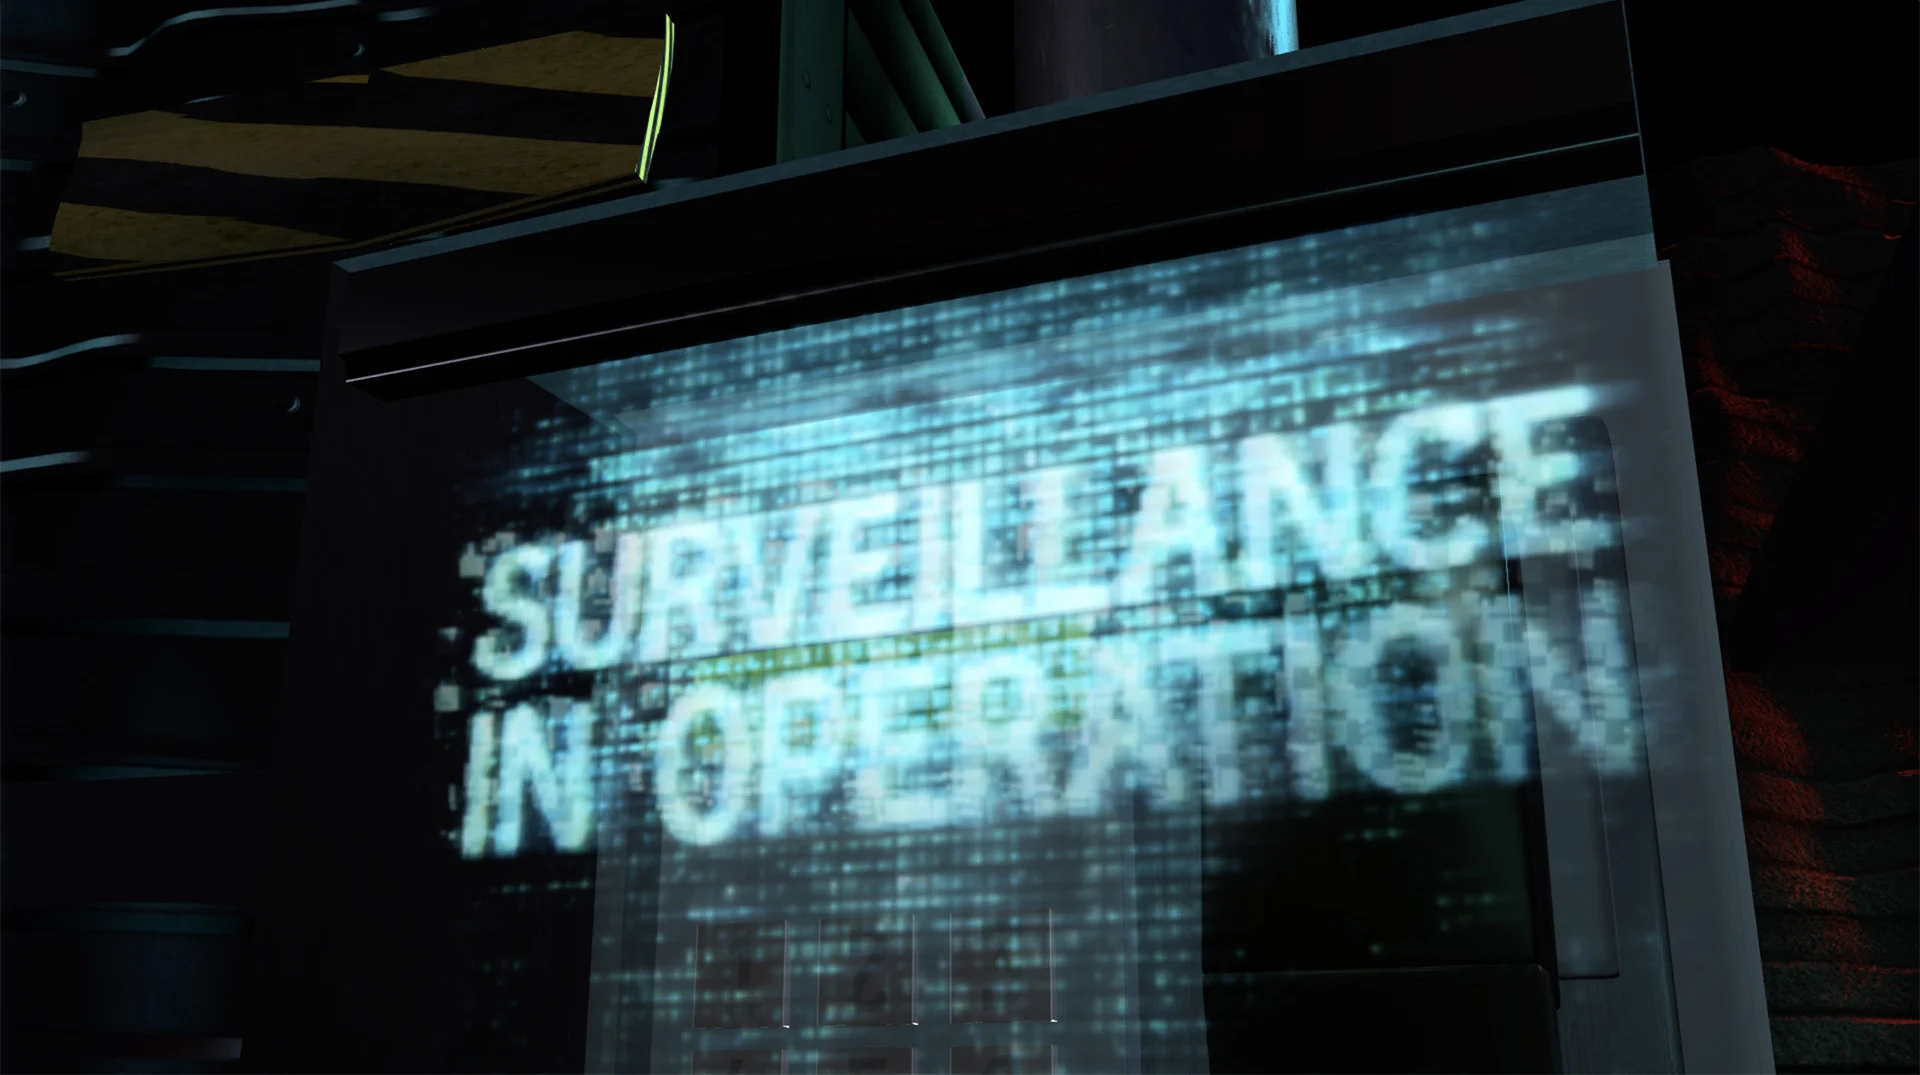
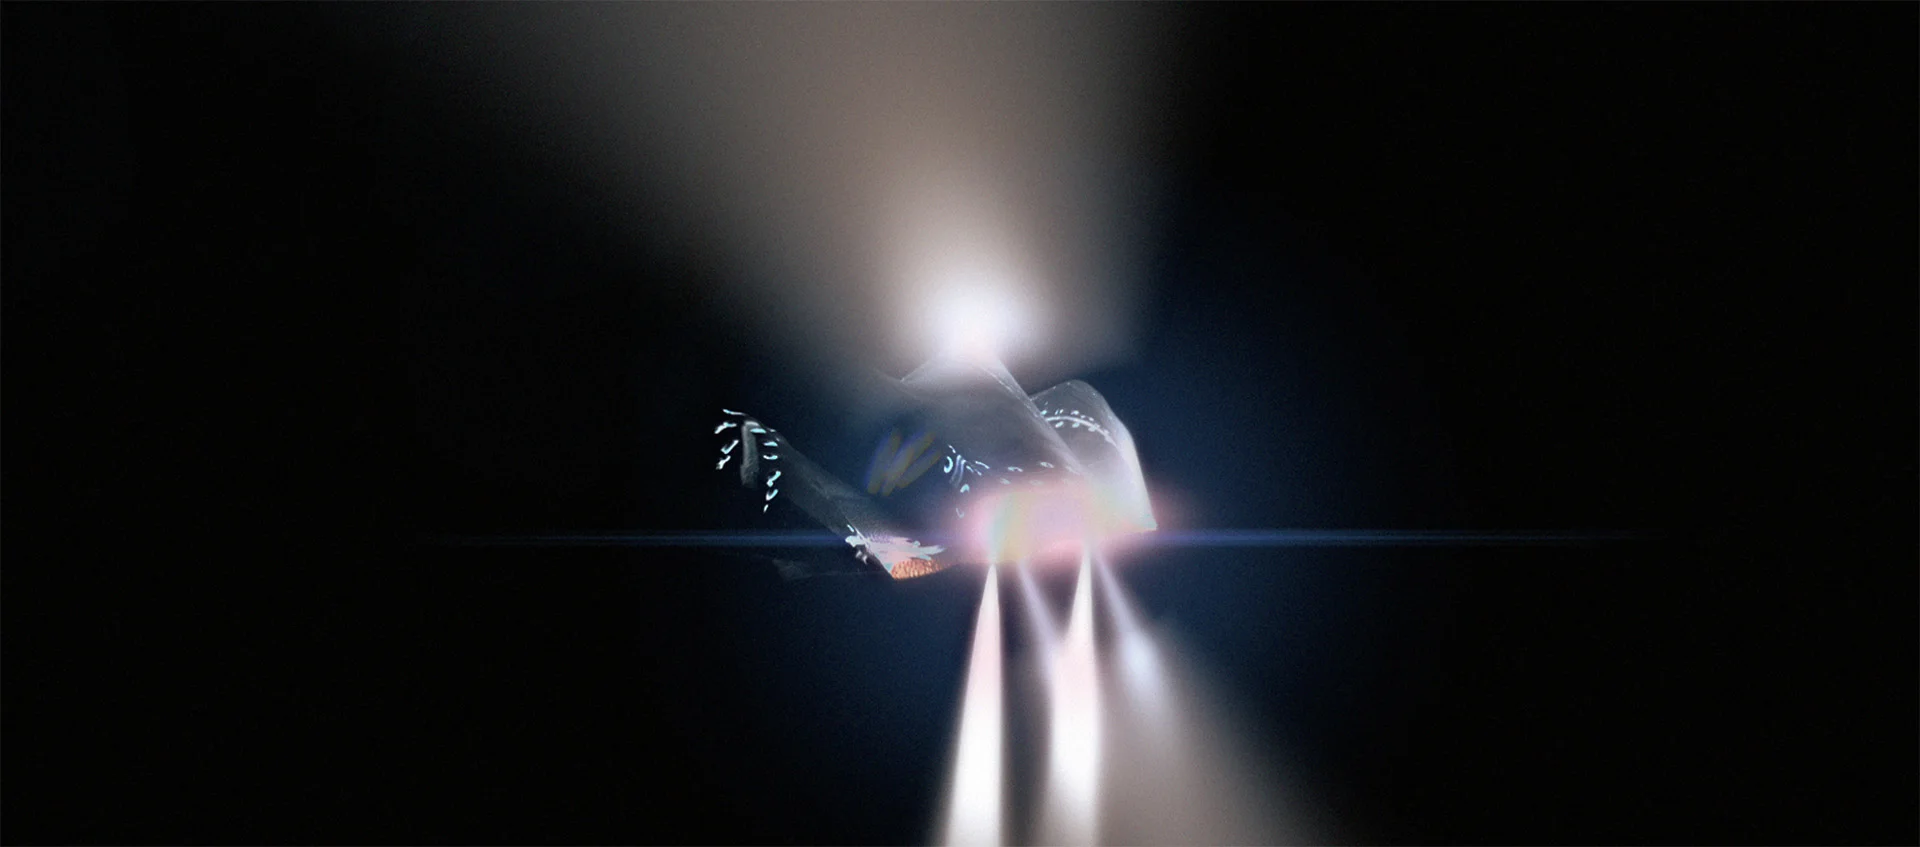
9th place - No Way Out
9th place - No Way Out
2018 - 9th Place
"No Way Out"
by Luke Cavalan - sydney, australia
From Luke:
Inspired by the science fiction cyberpunk genre, No Way Out makes a statement about society being under surveillance. We are constantly being watched and monitored by electronic devices. What would happen if surveillance devices had minds of their own and started attacking citizens? In No Way Out, a helpless bystander is the 5th victim targeted by a surveillance device. Can the bystander outsmart the device?
My main objective was to create a hologram within the 3D environment using Flame. Working on my entry, I experimented with the new Logik matchbox shaders and various compositing techniques to achieve my final result.
Whilst working on a laptop I had some challenges navigating cameras around the scene, adding multiple lights, animating key frames and texturing all the geometry in the scene. It would often crash, and to overcome these challenges I found myself working in proxy mode or hiding objects in the scene which sped up workflow and renders. I now have a better understanding of the full capabilities of the action node.
I really enjoyed composing the soundtrack for my entry. I’m a human beatboxer and didgeridoo player, so naturally I incorporated a range of vocal sounds.
It was great trying out the latest Flame software, thanks for giving me a license of Flame 2019 for the One Frame of White competition. I’m looking forward to using it again on future projects.
Thank you,
Luke Cavalan
5 Seconds to Land
5 Seconds to Land
2018 - "5 Seconds to Land"
by Haroldo Setti - São Paulo, Brazil
From Haroldo:
Hi. I'm proud of being part of One Frame of White 2018. Besides that, I felt like Jamaica on Winter Games, since I am pretty new at Flame, not part of a big studio (yet) or a big team and machines with no steroids. Well, no matter, lets play the game! I was lost between 3 ideas for this project, and had too many deadlines of other jobs on this months. Biggest challenge was discovering what Flame can do and how when I had time. I thought about a gunshot scene in a dark enviroment ,a kind of motivational video with animated words or the space scene, which was the final choice. I really like some weird effects Flame does with an unexpected behaviour at some times, and used a bit of this things on my project. Hope you like, keep on flaming.
5ive Lights
5ive Lights
2018 - "5ive Lights"
by Matt Riley - omaha, usa
From Matt:
As soon as I saw the theme for this year’s OFOW, I knew what I wanted to do. I didn’t really need another excuse to rewatch any of Star Trek: The Next Generation, but doing research/review for this project was a perfect reason to revisit a favorite episode. Bonus: it is a two-parter – double that early 90s sci-fi goodness!
I wanted to tell the story from Picard’s POV and include a few elements that stand out in the episode. I decided to keep things in silhouette to help build up the drama and creepiness and also to help hide some sins. I wanted to provide just enough detail to provide the context for the STNG reference to land but not too much so I didn’t over-extend myself trying to model an exact replica of the set and character. I was chasing emotional nostalgia rather than technical precision.
I spent quite a bit of time building a storyboard/animatic to determine the number and length of shots I wanted. Once I had the timing close, I built the set using simple 3D primitives from the Flame libraries and added additional detail with 3D shapes and deformers. I worked out my camera moves over many rough renders and started lighting things after that. From there, I just kept iterating over the scenes, adding objects and details with each revision. I used a number of matchboxes from the Logik collection for technical reasons (Ls FXAA is badass!) as well as final look development (Ivar you rock!). The music score was built from a few tracks I found in the official free YouTube music library – sound design isn’t something I get to do often so it was good geeky fun to build something in that realm, too.
This project was ultimately about constraints: The constraint imposed by the theme and contest rules, the constraint of the hardware I worked with and the constraint of my abilities and time. This project was executed start to finish on a 2012 Retina MacBook Pro. There were many things I had to do in order to accommodate the capabilities of this vintage machine, from aggressive node caching to learning what NOT to click on and when.
Creating an entry for OFOW has been an incredibly rewarding experience. I wasn’t prepared for that feeling when I decided to commit to doing it. I learned some new things along the way and appreciate the opportunity it provided to grow as an artist. There’s also much to be said for setting an ambitious goal and seeing it through all the late nights, weekends and busy family life. The satisfaction from reaching a goal is worth as much as any technical skill gained along the way.
I’m very pleased I could participate in this great event for the awesome Flame community!
-Matt
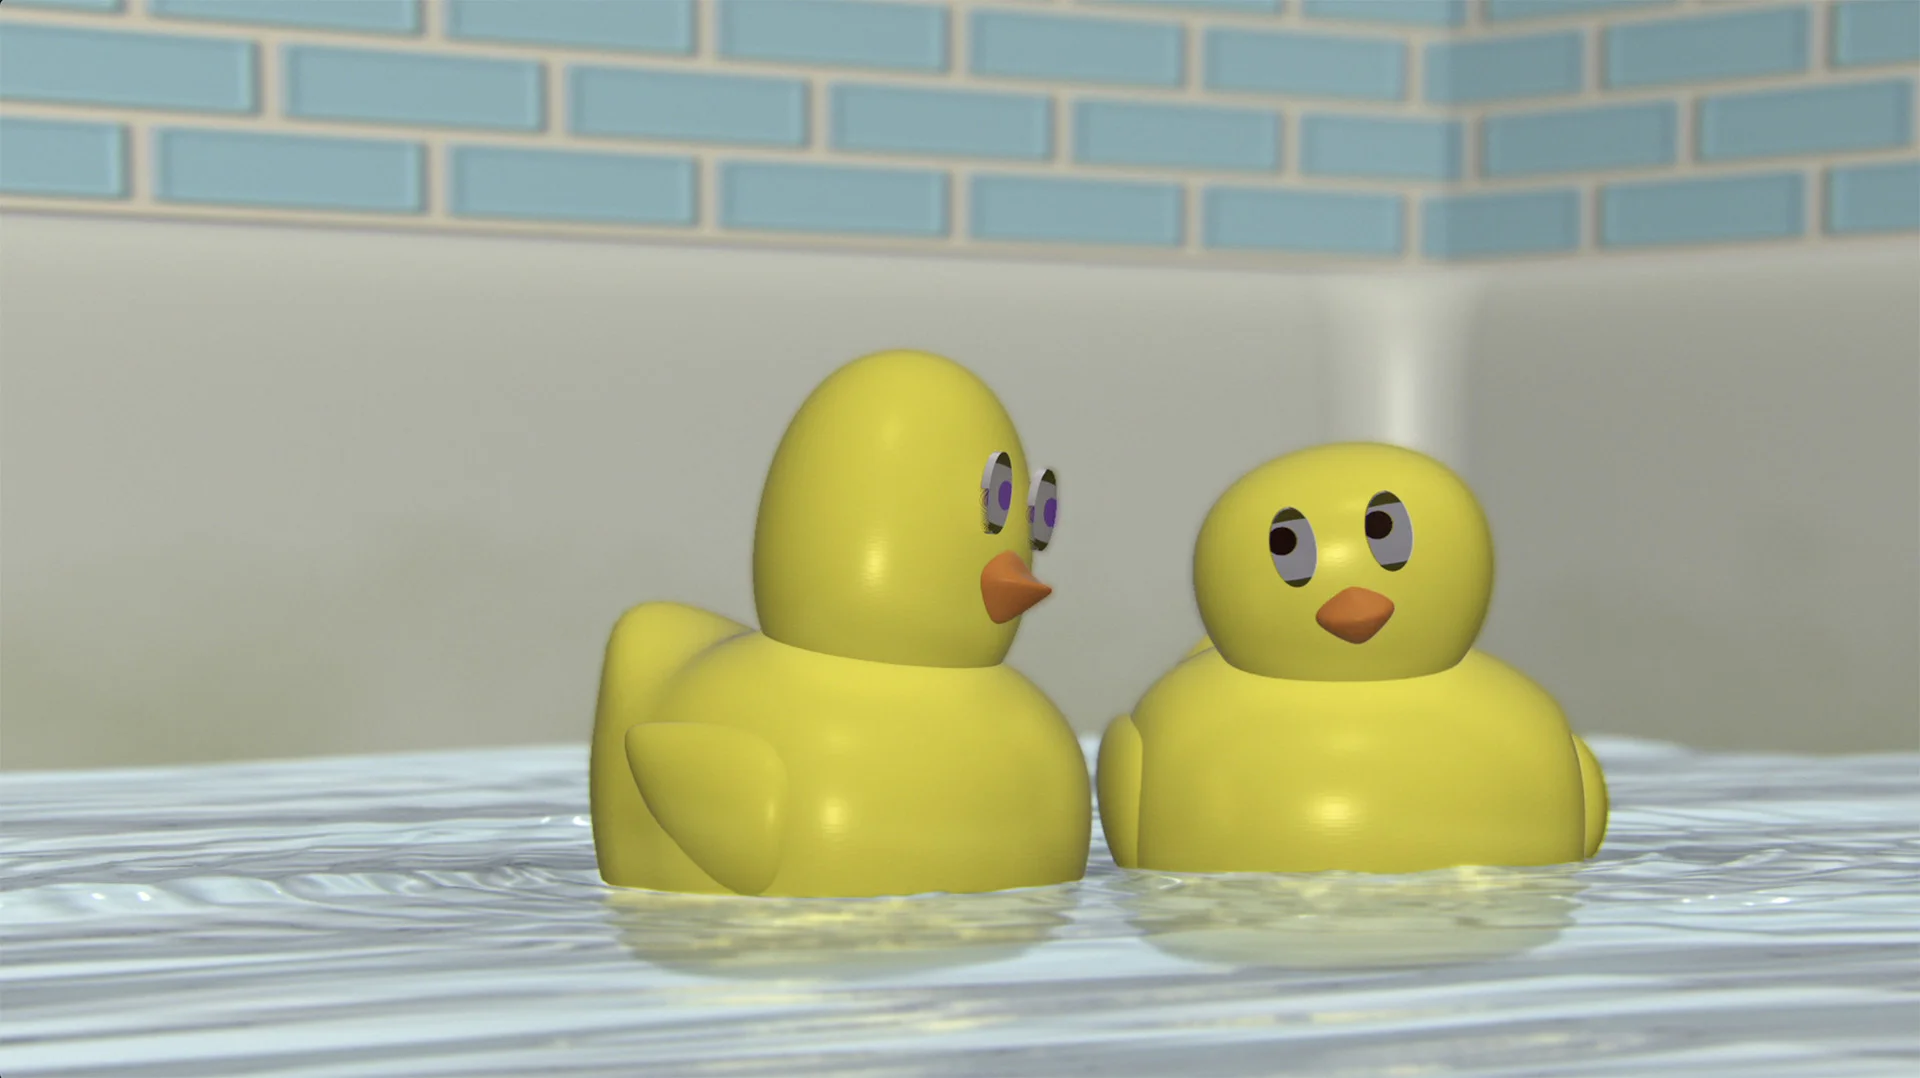
Quack
Quack
2018 - "Quack"
by sean smith - new york, usa
From Sean:
At the dawn of a calm and peaceful soak, a community of ducks is blown away by the arrival of an unexpected guest.
Inspired one night by our bath time play with my son's favorite rubber ducky toys, QUACK came to life over the course of six weeks.
The initial model of the duck was quick and straight forward to create. I took a few reference photos of the ducky to aid in the modeling and that proved to be very useful. Just a couple of spheres and a half domes and deform meshes created the shapes you see in the final product. I wanted subtle variations in them so we could tell them apart - eye color and bill shape helped with that. Their texture is a plastic vinyl.
The shark fin and cannon were all built with 3D shapes.
Lighting couldn’t have been simpler. An IBL I built in paint and one ambient light in Action were all that I used. I only moved the light a little to change the reflections in some of the cannon shots, but on the whole they were stationary.
The water was the opposite of the lighting. How many iterations of water animation I had is unknown… there were too many. The pattern used for displacement was built with a Sapphire texture and a Matchbox Water Turbulence blended together. Getting the speed, detail and amount in the sweet spot was time consuming to say the least.
Once the water and ducks were done, I turned to the animation. After considering a few different options, I wrote an expression to handle the bobbing motion (Y position, Z & X rotation). That simplified my overall animation task. With that complete, I was able to manually animate the Y rotation (spin in the water) and the X, Z position in the water. Additionally, I expression-linked their position in the water to a ripples matchbox, applied to the displacement map surface up stream (in an Image node). This again simplified any manual animation or manipulation as I moved into editing.
All of the above was built in one Action. All the reflections, AO, and additional glows, lens effects, etc.. were applied and comp’d down stream.
The Mighty 5 Shall Rise
The Mighty 5 Shall Rise
2018 - "The Mighty 5 Shall Rise"
by pietro marchioni - dubai, uae
From Pietro:
The Mighty 5 Shall Rise, Birth of a Hero.
The lightness, the heaviness and the absence of both.
Out of the pages of a book, Five, is born, barely seen. A composition of mist and lights like an old library shelve. Here I had fun with some masks to shape the ink, age the pages, giving a slow movement to the rising, to feel the solemnity of the moment. Then Five is falling in a different scenario, pushed by the gravity. I kept my composition dry, sterile, with nothing else than that I could use inside an action. Exercises in style. Playing with the animation curves to simulate dynamics. And then the Five slide, and reappear with a metal shell, floating off into space. There is no more gravity and the air is crisp, with light coming from a far away sun bouncing off the metal shell of Five. And I signed off in ink on my old school copybook.
It was great fun to create the story of my character walking on the edge of creating everything inside flame. I though at first of fitting it all in a single batch, but then I wanted to connect the different parts of the story with a glitch that would transport us in a different digital space within the same story. So I moved everything on a timeline, with BFXs layered, to give me more flexibility.
It was fun to participate. Thanks for keeping up the community with such great initiatives
Ciao Pietro
The Pivot Project
The Pivot Project
2018 - "The Pivot Project"
by amit nevagi - mumbai, india
From Amit:
As the saying goes “FATE DOESN’T CARE ABOUT YOUR PLANS”. It took me 20 long years to get a break on to using Flame. Since 2 years, I am trying to master the magic of FLAME. Most of you FLAMERS here have a huge experience as compared to me. So I am thankful to ONE FRAME OF WHITE for presenting this opportunity to enter the Flame Arena with the Guru’s of FLAME.
So here is how this project went. Started with a project, which was not this and ended up in the middle of family crises. By the time the crises ended there was a mail in my drop box saying 10 days left. So switched plans and decided to go with simple idea. The project was pulled off in a weeks’ time, working 24x7, barely meeting the submission deadline.
In this project I have mostly concentrated on Modelling, just to prove that Flame with the use of minimum (Reflections, IBL and Occlusion) plugins can deliver MAGIC.
Would definitely like to mention a few names here:
- My Boss and a very senior Flame artist Mr. Vipul Bhalala – for showing the trust and upgrading me from a Video Editor to Flame Artist
- The entire Flame Team working at Zee Entertainment Enterprise Ltd., who stood by me in thick and thin while learning FLAME.
- Mrs. Manasee Bakshi, my Ex-Boss and a well-wisher.
- Mr. Sandesh Vede and Mr. Rupesh Godkar for the audio.
- My wife Anjana and daughter Aveera, without whom this project was just impossible.
Thank you once again for letting me be a part of such a wonderful event.
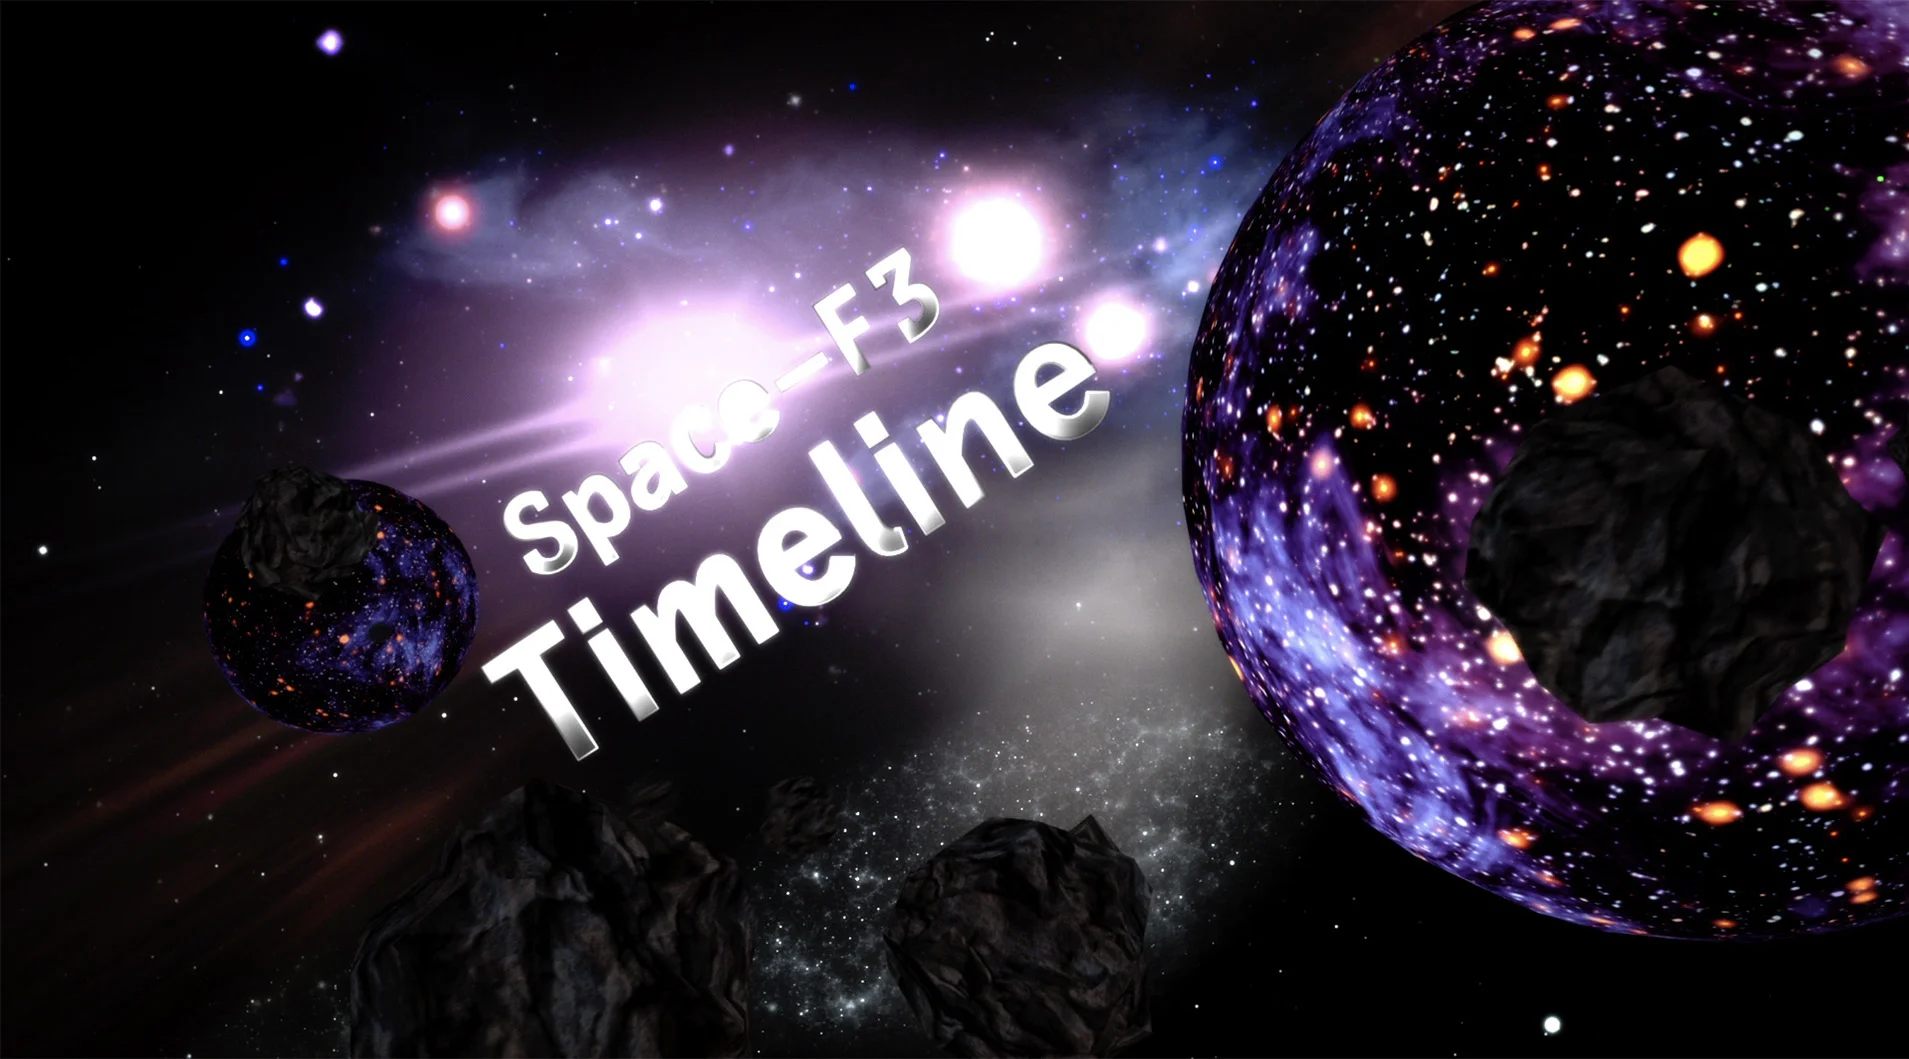
Space F5
Space F5
2018 - "Space F5"
by Parag jambekar - mumbai, india
From Parag:
Hi Flamers,
First congratulation to “OFoW” for 5th years anniversary.
‘OFoW’ is a great opportunity and a real challenge to create a piece of work where one could showcase their skills and at the same time compete with the best in the industry.
A description of my project:-
My 2018 One Frame Of White entry “SPACE F5”.
Space F5 is about 5 Flame tabs which are we use from 2014 to 18 i.e (mediaHub,Conform,Timeline,Batch,Tools) and its keyboard shortcuts, also F5 is for timeline layout. We worked in these Flame Galaxy Spaces. So i made Five different spaces.
I used displacement map, 3D Shapes, Matchbox Shaders, Substance texture and sapphire and also favourite tool Replica for do the stones.
I used 3D Shapes to create Flame logo at the end. BFX node also have 5 side so Flame logo appeared in it.
I am really happy to be part of it, I just love this group and community.
Cheers,
-Parag
Cherry Blossom
Cherry Blossom
2018 - "Cherry Blossom"
by tara holland - new york, usa
From Tara:
This story evolved out of wanting to try out Flames particles in a simple way for making cherry blossom leaves blow. I kind of built a little story around that, about a ladybug finding this beautiful cherry blossom tree area for the first time and being amazed by it. Mostly it was making alot of mattes and trying to work creatively, and figure out ways to stylize things to look more 2D.
5 Objects
5 Objects
2018 - "5 Objects"
by james emmerich - new york, usa
From James:
I have been experimenting with 3D path and particle expressions a lot recently. This project is a result of combining those two elements together. I also wanted to test out using cameras with the 3D path to have various camera moves that are controlled by one slider.
Another thing I wanted to explore was using PBRs and Stingray reflections to create a more dramatic lighting environment.